Create a New Square Document
You'll want to start by creating a new square document in Procreate (tap the + to open the New Canvas menu). I usually use the biggest size canvas possible - for me that's 27" by 27", but anything over 10" by 10" will work.

Enable the Drawing Guide
Before you start drawing you'll also need to enable the Drawing Guide. Open the Actions menu (you can tap the wrench), go the the Canvas tab and turn on the Drawing Guide. Edit the Drawing Guide and turn the grid size to Max. Tap Done and you should now see a vertical and horizontal line on your canvas.


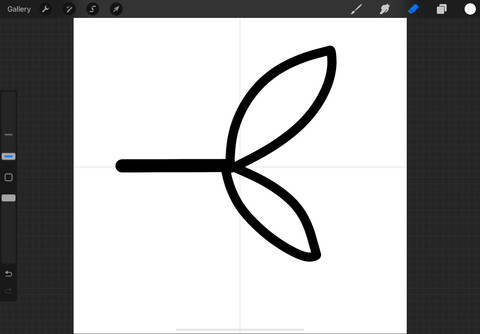
Draw a Stem
To create a wreath brush, you need to have a base branch but start by drawing a stem. I used the Monoline brush to draw a black horizontal line starting about a quarter of the way across the canvas to the center. This stem is going to be the line that joins our branches together to form the wreath.

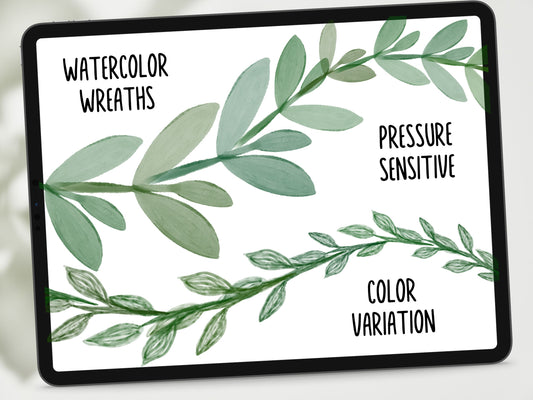
Add Leaves
One you have a stem, it's time to add some leaves to the branch. You can experiment with this part by drawing different shapes and sizes of leaves to see what works and creates a good looking wreath. You can also try using different textures and styles (my watercolor wreaths are my personal favorites) The only requirement is that you draw your branch in pure black (#000000) on a pure white (#ffffff) background.


Create a New Brush
When you're happy with your branch swipe down with three fingers and tap Copy All. Open the Brush menu and tap the + to create a new brush.


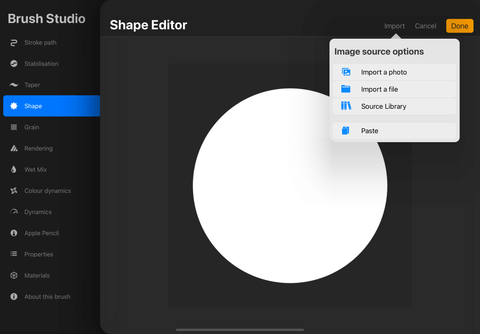
Paste Your Branch
Go the the Shape tab and tap the circle to the right of Shape Source. Tap the Import button in the top left corner and press Paste. You'll now see your branch in black on a white background. Tap with two fingers to invert the colors so that the branch is now white on a black background. Tap Done in the top right corner to save your changes.
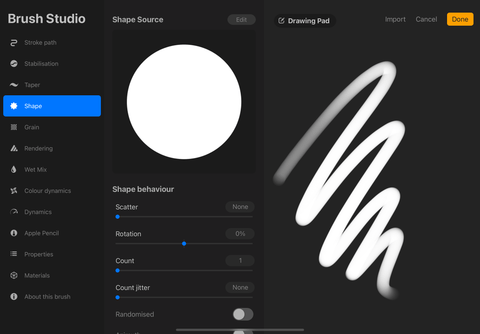


Edit The Brush Settings
The last step is to edit some more of the brush settings. Stay in the Shape tab and turn Rotation up until it says Follow Stroke so that the branches will rotate to follow the direction of your stroke. I also like to toggle on Flip Y - this will randomly flip some of the branches vertically and it creates a more organic wreath.

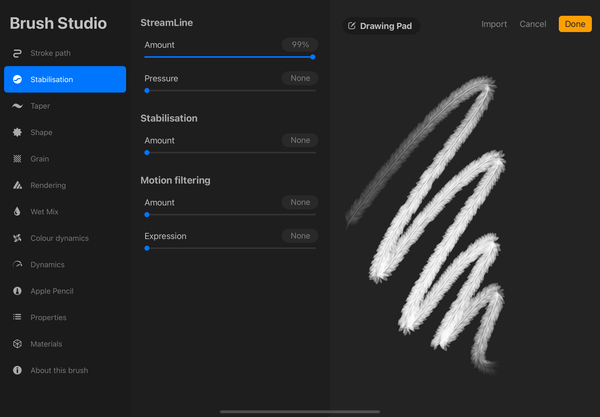
Another setting I like to change is setting the StreamLine Amount to Max in the Stabilisation tab (if you don't have a Stabilisation tab this will be under the Stroke Path tab).
Now go to the Apple Pencil tab and turn Opacity down to 0%. In the Properties tab turn the Maximum Size up - I usually set this to about 400%. Make sure to also Disable Orient to Screen (it should NOT be blue). If your wreath brush doesn't look right, this is the first thing you should check.


Lastly, go to the Stroke Path tab and increase or decrease the Spacing amount until your branches slightly overlap - there should be no gap and ideally the stem from the previous branch blends into the leaves from the next branch to make a seamless pattern. For this example, I set my Spacing to 41%, but this will probably be different for your brush.

Draw a Wreath!
And that's it! Click Done to save all your changes and now it's time to draw a wreath. Pick a color - I like to use a dark green - and draw a circle. Hold it in place for a second until it snaps into an ellipse and then tap with one finger (while still pressing down with the your pencil/finger using your other hand) to create a perfect circle and a perfect wreath!

I hope you found this tutorial useful! If you have any questions, leave a comment and I'll try my best to help.