What I'm Using
For this tutorial, I'm going to be using:
- An iPad - I currently use an iPad Air 4 and Apple Pencil 2
- Procreate - currently version 5.2
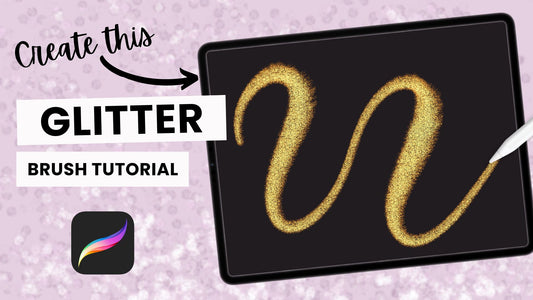
CREATE A GLITTER LETTERING BRUSH
Step 1: Create a New Brush
- Create a new canvas (the size does not matter) and open the brush library.
- As an optional step you can create a new brush set by dragging down the brush sets on the left-hand side and tapping the blue + button.
- Tap on the + sign to create a new brush.
Step 2: Edit the Shape Source
- Tap on the Shape menu on the left and next to Shape Source tap the edit button to open the Shape Editor.
- Tap Edit and then Source Library to open the default Procreate brush shapes. This is a great resource when you're starting to create your own brushes.
- Scroll down and select the Splash shape for this brush. You can also experiment and choose different shape sources to create different types of glitter brushes. Tap Done to save.
- Staying in the Shape menu, increase the Scatter setting to 125%.
Step 3: Edit the Grain Source
- In the Grain menu, tap the white square next to Grain Source to open the Grain Editor.
- Tap Edit and then Source Library and select the Bonobo grain.
- Tap Done to save your Grain Source.
- Increase the Scale to 33% and decrease the Zoom to 87%.
- Most importantly, make sure to change the Blend Mode (in the Grain menu) to Linear Burn.
Step 4: Edit the Brush Settings
- In the Rendering menu, change the Rendering Mode to Intense Blending and change the Blend Mode to Add.
- In the Stroke Path menu, decrease the Spacing to 10% and increase the Jitter to 4%.
- In the Stabilisation menu, change the StreamLine Amount to 100%.
- In the Apple Pencil menu, decrease the Opacity setting to None. If you have an Apple Pencil and want to make your brush pressure-sensitive, increase the Size to 80%.
- Lastly, in the Properties menu increase the Maximum Size to 350%.
- Tap Done to save your settings, and now you have a glitter lettering brush!